The Best And Easiest Neovim Setup
If you have finally wanted to switch over from VSCode, IntelliJ or any other coder and become a CLI Demon, I will explain everything about Neovim, benefits and plugins. You don’t need to know anything before reading this, and by the end of this post you will be a Neovim wizard.
What is Neovim ?
Neovim is a CLI (Command Line Interface) text editor that is known for its keyboard based command shortcuts that allow you to be more efficient without having to touch your mouse.
Neovim has different modes when you are using it.
Getting to normal mode you just need to press the <Esc> key and you will always get back to it. Insert mode can be entered by pressing <i>. Visual mode can be gotten into by pressing <v>.
- Normal mode — This is the mode you start with, here is where you will have you commands like hjkl
- Insert mode — This is the mode where you are able to insert your code/text.
- Visual mode — This is the mode where you can select and manipulate text with accuracy.
There are some other modes but we will go into more detail in another post. These are just the most important ones to know for the installation.
Neovim History :
Vi (Visual Interface) was the first editor that came out in the 1970s, it came with commands but vi was very simple because that's what was only needed at the time, then Vim (VI iMproved) was released in 1991, this had many improvements over VI and later it had the ability to add plugins. But the issue with VIM was that VIM script was terrible and very easily broke which is why Neovim was created. It allowed the programming language Lua to be used to add plugins and it made life easier and made the editor as good as it is today ( and still being improved )
THE CONFIG :
There are multiple different ways to setup your config. NvChad, LazyVim. These come preconfigured with a lot of different things, but also have quite a bit of bloat and unnecessary things that removing is a hassle as they use a starter config that calls the config and you don’t get to see and edit it directly. What we will use is called Kickstart.nvim, this config is much lighter with some preconfigured things that we all will definitely need and more things we will configure.
The beauty of Kickstart :
Kickstart is very simple and small and explains everything in its own code. If you want a very detailed video, please watch TJ DeVries, who is a very prominent figure in the Neovim community.
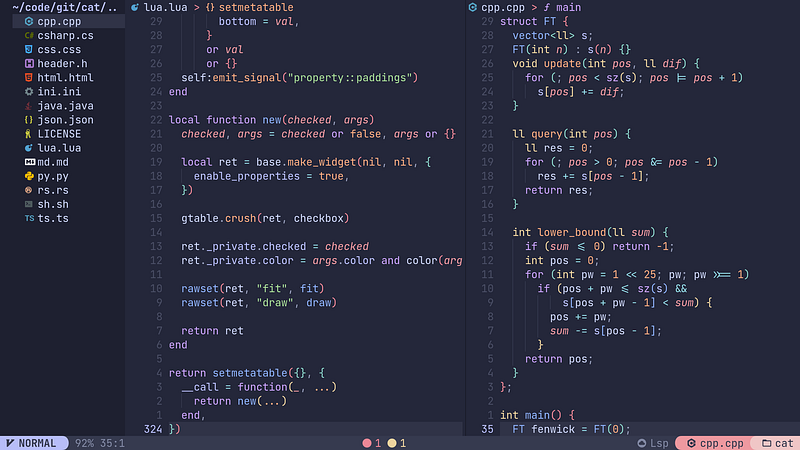
So lets get started with installing neovim first.
Follow the instructions based on your Operating system to install Neovim. To start neovim you just need to type
nvimInstalling Kickstart :
For Kickstart follow these instruction:
You don’t need to fork the repo, in this case we will remove the git file so you can make your own repo and upload the dotfiles from there.
We are downloading the modular version instead of the main version because the main version is mainly a single init.lua which makes life a little harder. Modularity allows the files to be small and simple and also makes sure each file has its own purpose reducing the amount of searching you will need to do to make edits.
Note : Make sure to read the init.lua file and check out the comments on the specific config that has already been done. A tip, you may want to use relative line numbers so you can turn it on as it allows you to jump around faster.
What is a neovim config ?
Your neovim config file is where all the configuration lies. init.luais the main initialising file. This is where we normally store all the configuration but with modularity you can set the code to require a folder or file
require 'options'For your configuration you will also need certain specific files that install the necessary things that you need, you will need a key-map file, a plugin manager file and files for those plugin managers.
Whats in the Kickstart config ?
Lazy.nvim :
Lets start with lazy.nvim. This is our package manager. Instead of having to download each file for a plugin and make sure our configuration loads it properly every-time. We can just use a plugin manager that will search Github or other VCS to find the plugin.
When using lazy you will follow this tree like structure
~/.config/nvim
├── lua
│   ├── config
│   │   ├── autocmds.lua
│   │   ├── keymaps.lua
│   │   ├── lazy.lua
│   │   └── options.lua
│   └── plugins
│       ├── spec1.lua
│       ├── **
│       └── spec2.lua
└── init.toml
When using lazy you will have a lock file which contains the information about the plugins to lock so that a plugin change will not affect you, updating the plugin will be done when in Neovim using :Lazy . It’s best to make sure your git-ignore file does not ignore the lock file if you want to be able to carry your config and you are scared of breaking it on the new update.
Plugins :
When we use plugins or keymaps that we make, we use a leader key, denoted by <leader> . When talking about keys we use the < > carrot brackets to denote the key.
For the leader its best to always use a key that is easy to access and will not get in the way. The most common option is the spacebar, which is what we has already been configured, you can choose to change it if you like it.
What has already been installed :
Plenery : This is a plugin that is a necessity in every configuration. It contains functions that allow you to not have to repeat yourself twice like, using require or async or path manipulation. And some of the plugins we use require it as they use it as a dependency.
Telescope : This is our main way of searching through files. Telescope uses fzf (Fuzzy finder) and grep (global regular expression search and print) these are very important and very useful command line operations that create databases of your files and allow you to search for file names and also search in your files specific words, E.g. you want to find your TODO’s you will just need to search that via the grep command built in.
Treesitter : This is one of the most important things you need as it improves syntax highlighting. Even after downloading a colour scheme, or using the one we have already, tree sitter will make sure that it will smartly highlight each word or sentence based on the context of the code making the code easier to read and follow.
Which key : This is very important to new users as this allows you to know the custom commands, just press the leader key and you will see all the options, descriptions given to the keymaps are what will show up as hints.
CMP : This is a completion plugin that helps with autocomplete for your code and works well with the LSP’s, very useful when you want to be able to just quick complete your code.
Conform : This will format your code to make sure all the styling is proper and nothing looks out of place and everything is uniformed, this makes your code much more readable and conforms to the industry standard.
DAP : This is a debug plugin that allows you to have the same debug functions in other IDE’s with the same functionality like breakpoints and you are able to attach it to running applications and debug them]
Gitsigns : This plugin shows git functionality like git diff signs and provides an easy way to navigate and manage git changes.
Indent Line : This plugin adds indentations guides, it visually indicated code blocks’ indentation levels with vertical lines making the code structure easier to understand
Lint : This plugin provides linting to Neovim and supports many languages and help catch syntax and style errors. Linting is the process of finding errors in static code like misspells
LSP config : This will configure all the LSP’s ( Language server protocol ) for whatever language you are coding in, LSP’s are the main way you can have advanced diagnostics, completion features etc making sure everything in your project is working together properly
Mini : This contains small plugins from the mini suite that package very specific plugins that do single tasks like mini.animate animates your config if you want adding delay to the movements.
Todo comments : This is a great plugin for you to be easily able to see your todo , fixme and other comments for you to be able to even search for all these comments making it easier to code later or with people.
There is a plugin called neo-tree, but you can remove the lua file as we will not be using it for this config. It shows a tree like file system but its not efficient to use this as projects that contain a lot of files and folders you can’t be sifting through of that to create new files or folders. We will use something better.
There is also the tokyonight plugin but that is for aesthetics, you may think about changing the colour scheme as you like this is purely personal preference
New Plugins to install :
Harpoon : A plugin created by a YouTuber, ThePrimeagen. This plugin will map files to certain key-binds so you can quickly switch between allowing you to more efficient with your workflow
Oil : This is the directory plugin that we will use in-case of neo-tree or netrw which you may be used to, Oil makes it a lot better by making the file system a buffer like system allowing you to change and edit as you want and has icons to make the UI better as well with confirmations to prevent user errors as well.
Fugitive : This is one of the best git wrappers that bring the full Git functionality. It allows you to run git commands, view diffs, stage changes and interact with remote repos from inside the editor.
Neogen : This is an amazing documentation generator. For new code snippets, functions or files you can use this to generate basic instruction for what the code is supposed to do which help with documentation and is necessary to have in any collaborative projects.
Neotest : This is an integrated testing environment in Neovim, allowing you to run view and manage tests within the editor, amazing tool to allow you to not have to pop out of Neovim.
Trouble : This is a diagnostic and quick-fix UI for Neovim, it displays all the errors and warnings from your LSP in separate window allowing you to easily be able to navigate and solve your issues.
Undo Tree : This is an amazing plugin that allows you to use Neovim’s record of undo history and you are able to navigate it easily for any case you need to see what you changed.
How to Install ?
I will not show you how to install every single plugin as its not too hard to do this, I will just show you to format and explain how installing the plugin works.
You can go to the github links to find the installation guide, i have linked them all for the plugins that are already installed in-case you want to change something.
Installation:
We will create a new file for each plugin we will want to install, here is an example of a plugin
return {
  -- add symbols-outline
  {
    "simrat39/symbols-outline.nvim",
    cmd = "SymbolsOutline",
    keys = { { "<leader>cs", "<cmd>SymbolsOutline<cr>", desc = "Symbols Outline" } },
    opts = {
      -- add your options that should be passed to the setup() function here
      position = "right",
    },
  },
}
You will notice github doesn’t show return, that's because the installation is on the basis of single file installation. It doesn’t defer if it modular. We are just using the return { } part to encase the installation.
The "simrat39/symbols-outline.nvim" represents the plugin name, cmd refers to commands that will be extended to your commands. You are able to call them with :Command , keys are your keymaps but we will do this outside in your keymap.lua file. opts are custom options that you can configure on the basis of how you want the setup to be.
Note : Make sure to quit Neovim to reload the lazy.nvim so it loads all of the plugins that we want to install :Lazy to make sure to check all the plugins have loaded.
Keymaps :
Now we will configure some key maps to make our life easier and have a few good shortcuts
I will show you how keymaps are set and what each part means.
Example :
vim.keymap.set('n', '<Esc>', '<cmd>nohlsearch<CR>', { desc = 'nohlsearch' })vim.keymap.set() is our command
n means normal move ( you will use i for insert, v for visual, t for terminal etc )
<Esc> is the key that is not a character like <Shift> or <Tab>
<cmd>nohlsearch<CR> is the command to be executed. It can even be a built in command like vim.cmd.Ex if you want to run Netrw.
{ desc = 'nolsearch' } This provides a description for the keymap, which the plugin Which-key will use so in case you forgot you know what it does.
List of keymaps :
These you will add it into the keymaps.lua file, i will explain a bit of why i chose the specific keybinds
Quick note ( Do remember to disable arrow keys in normal mode, this will help you use h j k l for movement )
TODO
-- Oil Nvim keymap
vim.keymap.set("n", "<leader>pv", "<CMD>Oil<CR>", { desc = "Open parent directory" })

-- Source File to update
vim.keymap.set("n", "<leader>so", function()
    vim.cmd("so")
end)

-- Harpoon keymap
local mark = require("harpoon.mark")
local ui = require("harpoon.ui")

vim.keymap.set("n", "<leader>a", mark.add_file)
vim.keymap.set("n", "<C-u>", ui.toggle_quick_menu)

-- Using Qwerty layout ( Change based on layout ) ( Use right hand home row
-- keys where your fingers rest )
vim.keymap.set("n", "<C-j>", function() ui.nav_file(1) end)
vim.keymap.set("n", "<C-k>", function() ui.nav_file(1) end)
vim.keymap.set("n", "<C-l>", function() ui.nav_file(1) end)
vim.keymap.set("n", "<C-;>", function() ui.nav_file(1) end)


-- Undo Tree Keymap

vim.keymap.set("n", "<leader>u", vim.cmd.UndotreeToggle, { desc = "Toggle Undo Tree" })

-- Trouble Keymaps

vim.keymap.set("n", "<leader>tt", function()
  require("trouble").toggle()
end, { desc = "Toggle Trouble List" })

-- Go to the next Trouble item, skipping groups and jumping to the location

vim.keymap.set("n", "[t", function()
  require("trouble").next({ skip_groups = true, jump = true })
end, { desc = "Next Trouble Item" })

-- Go to the previous Trouble item, skipping groups and jumping to the location

vim.keymap.set("n", "]t", function()
  require("trouble").previous({ skip_groups = true, jump = true })
end, { desc = "Previous Trouble Item" })

-- Neotest Keymaps

-- Run the nearest test
vim.keymap.set("n", "<leader>tc", function()
  require("neotest").run.run()
end, { desc = "Run Nearest Test" })

-- Run all tests in the current file
vim.keymap.set("n", "<leader>tf", function()
  require("neotest").run.run(vim.fn.expand("%"))
end, { desc = "Run All Tests in File" })

-- Neogen Keymaps

-- Generate documentation for the current function
vim.keymap.set("n", "<leader>nf", function()
  require("neogen").generate({ type = "func" })
end, { desc = "Generate Function Documentation" })

-- Generate documentation for the current type
vim.keymap.set("n", "<leader>nt", function()
  require("neogen").generate({ type = "type" })
end, { desc = "Generate Type Documentation" })

-- Fugitive Keymaps

-- Push changes to the Git repository
vim.keymap.set("n", "<leader>p", function()
  vim.cmd.Git('push')
end, { desc = "Git Push" })

-- Pull changes from the Git repository with rebase

vim.keymap.set("n", "<leader>P", function()
  vim.cmd.Git({ 'pull', '--rebase' })
end, { desc = "Git Pull with Rebase" })

-- Push to a specified branch, setting upstream if necessary
-- This command allows you to specify the branch and tracking information
vim.keymap.set("n", "<leader>t", ":Git push -u origin ", opts)

-- Adding description for which-key
-- Note: Since this keymap expects additional input (branch name), which-key will prompt accordingly
vim.keymap.set("n", "<leader>t", ":Git push -u origin ", {
  desc = "Git Push with Upstream",
  expr = true, -- Allows the command to be completed with further input
})
You may think you would want to separate the commands further but being modular is based on simplicity. Keeping all key binds in the same place allows you to know where to look and adding comments allows use to be able to jump to sections we need.
And that’s it. You now have created a good setup with keybinds that has all the good plugins that you need to get started working with neovim as your editor.
Feel free to add or change anything you like or dislike about this, I have tried my best to explain as much as possible so changing anything should feel simple.
Feel free to contact me on twitter or add comments here if I have missed something or something is missing, my twitter is @ gauranshmathur.
Member discussion